E.V.O.: Search for Eden (Super Famicom)
Walkthrough for all 5 chapters
From fish to Eden. Follow the places to re-enter, branch requirements, return routes and points to reserve before bosses in order.
Scope: Japanese Super Famicom version (released December 21, 1992) / Content checked: October 2, 2026
Chapter 1, Fish: caves and your first evolution
- Listen to the jellyfish in the Sea of Departure, then bite and defeat it with Y. Eat its dropped meat to gain EVO.P, then open evolution with SELECT.
- If your initial bite is weak, work toward Cladoselache jaws. They cost 200. Fins and tails that change your fish's speed also help you get away from enemies.
- In the Cave of Guidance, eat the yellow crystal, listen to the explanation and return along the route you entered. Distinguish exploring farther into a cave from heading toward its exit.
- When the red crystal in the Cave of Temptation changes your form, save it in Evolution Records while the transformation lasts. Do not keep searching for a time-limited form among ordinary body-part evolutions.
- Both ends of the Sea of Thelodus are initially blocked. Keep moving while you wait for an eruption to open the route; defeating all enemies is not the condition for leaving.
Chapter 1: defeat Cladoselache and reach land
- Take the route along the bottom in the Cave of Dinichthys. Check your health in the eruption section; if it is low, evolve with your remaining EVO.P to heal.
- Pass the Cephalaspis group and the trilobite cave. Leave room to escape upward or downward so curled-up enemies do not pin you against a wall.
- Defeat the boss deep in Cladoselache's territory. Avoid its charge and bite during the opening when it hits a wall. Do not stay near its tail for long.
- After the fight, head to the Pangaea Coast. Jump at the water's surface to reach land, then move right to enter the amphibian chapter.
- EVO.P resets in the next chapter. Spend Chapter 1 points on preparing your current fish rather than saving them as Chapter 2 shopping funds.
Chapter 2, Amphibians: a jumping body and Debuchiostega
- Check the yellow crystal on the Pangaea Coast and the clue in the Empty Land. Your form changes to one suited to swimming in sections where you enter water.
- Timid Ichthyostega flee, while bold ones attack. Instead of only trading bites head-on, use B to jump and check which enemies you can stomp.
- If you want to advance by stomping, spend points on a power tail or dorsal fin. For biting, prioritize jaws. Before buying a little of both, choose an attack that can reach the enemy in front of you.
- In the Elder's Land, avoid Debuchiostega's liquid and jumps. Stomp or bite during openings after it lands or spits.
- The elder and child after the fight are part of progression. Do not attack them for meat; finish their conversations and move on.
Chapter 2: Bee King and Bee Queen
- If you gather jaw costs in Protophasma Land, fight from a position where nighttime enemies approaching from both sides cannot surround you. Ferocious jaws cost 1500.
- Pass through the giant-bee sections to the Bee King's Cave. Watch the father's event at the entrance, then defeat the larvae farther inside.
- The Bee King appears after all the larvae are defeated. Avoid its repeated stinger shots on the ground, and bite when it comes low enough.
- Listen to the conversation in the Desert of Choice, then pass through the sand-eating worm section. Do not chase the worms as enemies you must defeat to open the way.
- Watch for Edaphosaurus' dorsal-fin attack and Moschops emerging from the sand. At the Door of Time, avoid the Bee Queen's charge and counter during the opening after it misses.
Chapter 3, Dinosaurs: branching paths and Primitive Mother Frog
- Choose the swamp or land route at the entrance. You do not need to defeat every enemy on both paths; take whichever route your current body handles more easily.
- Pass through the first Styracosaurus conversation without attacking. Do not confuse it with a boss you must defeat.
- Do not carelessly launch repeated attacks on Brontosaurus. If your body cannot defeat it before it starts moving, jump past it and collect evolution points from the next enemies.
- Parasaurolophus counters with its cry. If you attack, keep landing hits before it counters rather than fleeing too far between attacks. Do not stomp from above while Stegosaurus' dorsal plates are moving.
- After watching the scene where a primitive frog bullies a child, leave and re-enter. Primitive Mother Frog appears; target the mother rather than trying to wipe out the small frogs.
- After winning, listen to Styracosaurus talk about Mt. Courage. If you want to become a bird, continue to the mountain's summit.
Chapter 3: the bird branch and the clouds
- To become a bird, jump off the left side of Mt. Courage's summit. Check the voice at the summit instead of confusing this with falling from an ordinary cliff.
- A bird must be developed again from its initial form. Use B to fly and improve its jaws and body. Not every body and tail option available as a reptile necessarily remains available.
- On the stage-selection screen, press B when the moving cloud passes above your bird to enter a hidden area. Save the dragon from the cloud's red crystal in Evolution Records.
- Leave through the exit above the clouds to reach the Asteroid River. Look for the alien event and the blue crystal worth 9999 on the high asteroid to the left. There is another red crystal in the middle.
- After the hidden area, resume the dinosaur route. Refuse Tyrannosaurus' proposal, avoid its charges and wait for the timed event that takes you to the next chapter.
Chapter 4, Ice Age: whether to choose a mammal
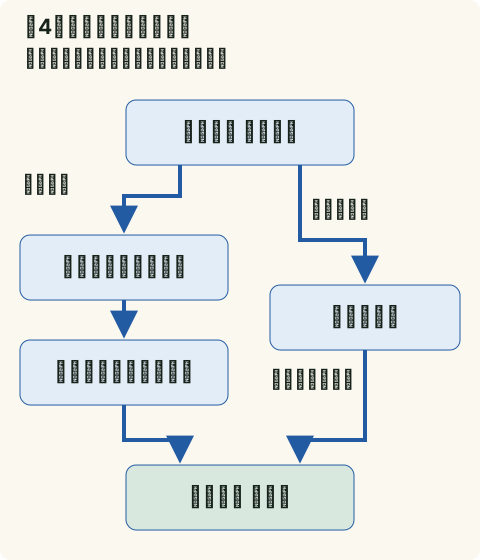
- At the Cave of Judgment, choose whether to become a mammal. You can remain a reptile or bird, so first decide whether to continue flying side trips or take the human branch.
- After changing to the initial mammal form, improve its jaws and body. Cat-type jaws and a rabbit-type body are prerequisites for becoming human.
- At the snowy mountain entrance, choose whether to climb the mountain or enter the cave. The mountain route crosses Paramys Land and Archaeopteryx platforms to the exit; the cave leads directly there. Falling through platform gaps means starting again, so do not rush.
- The ice door beyond Hyaenodon is not something you can push open now. Take the surviving-dinosaur route toward the North Pole and Mammoth Land.
- Defeat the 3 mammoth brothers one at a time. Avoid their bubbles and bite when they approach. Listen to the information after winning, then head to the Vanishing Ice Pillar.
Chapter 4: Birdman Fortress and the Yetis
- Approach the Vanishing Ice Pillar to be taken to the fortress. Head right outside, then use the warps inside. Re-entering a warp does not necessarily return you to the previous room.
- The fortress's red crystal gives a special elephant evolution. Save it in Evolution Records before moving on if you want to keep the form. A green crystal can also reproduce a form before the boss.
- Refuse the Birdman King's proposal and fight. Bite the floating enemy, then keep hitting it as it tries to rise again after falling.
- After finishing the fortress, the ice blocking the Hyaenodon route disappears. Return there for consecutive battles with Yeti and Yeti Mama.
- Jump over Yeti's punches; avoid Mama's blizzard and striking motion together before attacking. Reserve EVO.P for healing through evolution during these consecutive fights.
Chapter 5, Mammals: forests and Condor Mountain
- In water sections, do not stay close to groups of small carnivorous fish for long. Watch for crocodiles diving too, and separate movement from attacking.
- Grizzlies jump high. If you do not need to defeat them to earn points, pass while they sleep.
- In the Hidden Stegosaurus Forest, sparing the creature gives you a hint about human evolution. Before choosing a human, check whether you still have mermaid or bird side trips to do.
- Take the blue crystal worth 5000 at the top of Condor territory. If you came as a bird, you can look for the UFO event by flying farther upward.
- In the Ape-Man Cave, press up or down on the elevator to move. Avoid the Yeti's repeated punches farther in, attacking according to its landings and changes of facing.
Chapter 5: the final sea and the stone circle
- For the mermaid branch, enter the Final Sea as a mammal. Keep a separate save if you have already advanced your body toward a human, then open limb evolution in your current form.
- Take the lower route through the sea cave to Ragon. Agreeing with its argument leads to an alternate ending; refuse and fight if you want to proceed to Eden.
- Even when its light attack narrows your view, keep track of its position and bite. If you fight in a special form, check the control for eating meat too.
- Press B in the center of the stone circle in Diatryma Land to reach another continent. Use this entrance for the side trip to the surviving Bee Queen.
- After finishing the Final Sea, take the surviving Tyrannosaurus route. You can reach the exit without trying to defeat every enemy. Head to Eden's entrance.
Chapter 5: Eden's entrance and Bolbox
- If the Cro-Magnon at the entrance knocks you away with its club, you are sent outside. Watch the gaps between stomps and attacks instead of staying recklessly in front of it.
- Explore the lower levels using the cave elevator, then take the green crystal before the final battle. Check Evolution Records and which forms you can reproduce.
- Damaging Bolbox's main body makes it spit out an orb. Deal with the enemy emerging from the orb first, then attack the main body again once it is clear.
- Do not memorize the 8 orbs as a fixed sequence. The small jellyfish becomes a larger form after you defeat it. Distinguish the fleeing child and the meat-only orb from orbs with enemies to defeat.
- After dealing with every orb, land the final attack on the main body to reach the ending. Do not spend all your EVO.P reserved for healing; handle the long battle in manageable stages.

Surugaya Retro Games
Find used games, consoles and strategy guides in one place
Find E.V.O.: Search for Eden on Surugaya
Used games, strategy guides and related goods
Find used copies of E.V.O.: Search for Eden
Used items on Amazon
E.V.O.: Search for Eden strategy guides and guidebooks
Search strategy guides on Rakuten Books
Find E.V.O.: Search for Eden on Rakuten
Used items and related goods on Rakuten Marketplace
This section contains advertising and affiliate links. Purchases through Amazon Associates, Rakuten, Surugaya and other linked retailers may earn us a commission.

eShop ¥5,000

Switch Pro Controller

Nintendo Switch 2

JVC GG-01
Affiliate links to Amazon Japan. Purchases may earn us a commission at no extra cost to you. Check the retailer for current prices.
ELECOM controller
Switch OLED — Splatoon 3
Roguelike Design Theory
eShop ¥5000 — Rakuten
Affiliate links to Rakuten Japan. Listed prices are indicative; check the retailer for current prices.