Brotato
Brotato Character Tier Comparison: First Clear and Danger 5 Picks
A first clear and a Danger 5 attempt have different available characters and preparation needs. Pick an unlocked candidate whose scaling and weapon restrictions you understand, then turn that choice into the next purchase.
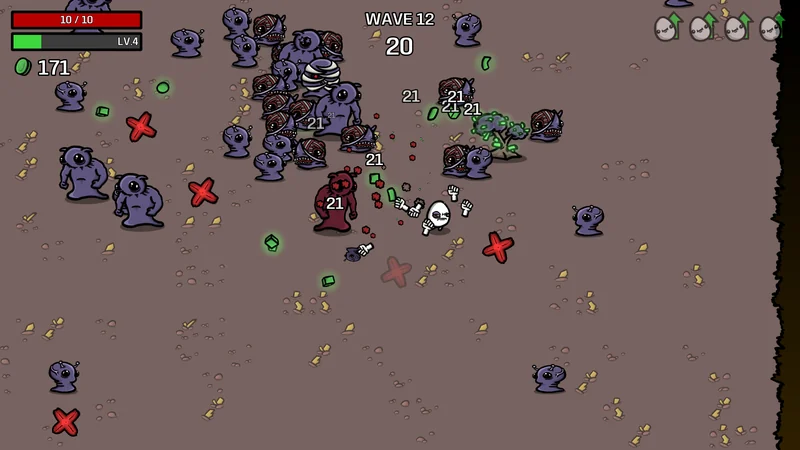
Image: Blobfish Games
5 sections. Spoiler details are not included in search.
Choose for a first clear or a first Danger 5 clear
Before a first clear, start from Well Rounded, Brawler, Crazy, Ranger or Mage and choose a mechanic you understand. Knight requires a Danger 4 clear and Bull a Danger 1 clear, so neither is an available first-run recommendation while locked.
This tier comparison is a guide to choosing a character for a specific goal. It compares 17 base-game characters, not measured win rates for all 64. The 14 Abyssal Terrors characters, Endless and Nightmare are outside the same rating conditions.
| Goal | Candidates to try | Selection condition |
|---|---|---|
| First clear: standard plan | Well Rounded | Align the scaling of a main weapon such as SMG, then balance damage and survival. |
| First clear: melee | Brawler | Use Fist and Unarmed; keep HP and protection instead of relying entirely on Dodge. |
| First clear: ranged | Ranger | Develop Ranged Damage for guns such as SMG and compensate for the HP modifier. |
| First Danger 5 clear | Knight / Engineer | Knight first needs a Danger 4 win; Engineer needs 5 turrets at once. Check weapon restrictions and structure scaling. |
| Try a different win plan | Bull / Pacifist | Weaponless damage or survival with enemies alive calls for a different shopping plan. |
Compare 17 characters: unlock, mechanic and starting plan
The effect column selects information useful for these builds. It is not a complete character-stat or weapon encyclopedia, and it does not guarantee particular shop offers.
Separate cumulative kills, material collection and trees from simultaneous structures, a single wave and clearing a specified Danger. Weapon scaling is different from range or visual appearance.
| Character | Unlock | Build-relevant effects | Starting plan |
|---|---|---|---|
| Well Rounded | Available from the start | +5 Max HP, +5% Speed, +8 Harvesting; no special weapon-type limit. | Start with SMG, add matching copies and favor weapons that share Ranged Damage scaling. |
| Brawler | Available from the start | +50% Attack Speed with Unarmed, an extra Fist, +15% Dodge; -50 Range and -50 Ranged Damage. | Start with Fist and keep the Unarmed focus. Hand can support the economy without replacing all your damage. |
| Ranger | Available from the start | +50 Range, an extra Pistol; Ranged Damage modifications +50%, Max HP modifications -25%; no melee weapons. | Start with SMG, use the extra Pistol early, and judge the remaining guns after the main plan is established. |
| Mage | Available from the start | Elemental Damage modifications +25%; starts with Snake and Scared Sausage. Melee/Ranged modifications -100%, Engineering modifications -50%. | Starting with Taser gives you a way to slow enemies and deal Elemental Damage. Check the scaling rather than assuming a projectile uses Ranged Damage. |
| Engineer | Have 5 turrets present simultaneously | +10 Engineering and +25% Engineering modifications; an extra Wrench and grouped structures. Damage% modifications -50%. | Use Wrench for structures. Its melee swing and the turret are separate upgrade targets. |
| Knight | Clear Danger 4 | +3 Armor; +2 Melee Damage per 1 Armor. Melee weapons of tier II or above only; Attack Speed modifications -50%, Harvesting modifications -80%. | Use melee scaling. An unlocked Spiky Shield is another option, but that shield scales from Armor. |
| Bull | Clear Danger 1 | +20 HP, +15 HP Regeneration with +50% modifications, +10 Armor; taking damage triggers an explosion and weapons are unavailable. | No weapon slots: the explosion uses Melee, Ranged and Elemental Damage. An ordinary Attack Speed or Range plan does not transfer. |
| Pacifist | Collect 10000 materials cumulatively | Gain 0.65 material and XP per enemy alive at wave end; starts with Lumberjack Shirt. -100% Damage and -100 Engineering. | Consider Hand to push a route open. Survival tools serve a different purpose from a full-clear damage build. |
| Loud | Defeat 5000 enemies cumulatively | +30% Damage, +50% Enemies, -3 Harvesting at wave end. | Make enough crowd damage to handle the extra enemies before relying on the economic benefit. |
| Crazy | Available from the start | +100 Range with Precise, +25% Attack Speed, an extra Knife; -30% Dodge, -10 Engineering and -10 Ranged Damage. | Focus on Precise. Use HP, protection and recovery to cover the Dodge penalty. |
| Explorer | Destroy 50 trees cumulatively | More trees; Lumberjack Shirt, +10% Speed, +50% pickup range, +33% map size, +25% Enemies and +10% Enemy Speed; -50% enemy materials, -40% Damage. | Plan a collection route without chasing a tree into a dangerous crowd. |
| Lucky | Collect 300 materials cumulatively | +100 Luck with +25% modifications; a 75% chance to deal Luck-scaling damage on material pickup; -60% Attack Speed and -50% XP. | Collection helps damage, but you still need weapons that handle the current wave. |
| Gladiator | Defeat 20000 enemies cumulatively | +20% Attack Speed per different weapon type, +5 Melee Damage; no ranged weapons; -40% Attack Speed and -30 Luck. | Use different melee weapons that share useful damage upgrades. |
| Old | Defeat 300 enemies cumulatively | -25% Enemy Speed, +10 Harvesting, -33% map size, -10% Enemies and -10% Speed. | Cover the smaller movement area with crowd damage or knockback. |
| Mutant | Defeat 2000 enemies cumulatively | -66% required XP, +50% item prices. | Use level-ups for strength and narrow shop purchases to what the run needs. |
| Chunky | Die for the first time | Max HP modifications +25%; +1% Damage per 3 Max HP, +3 consumable healing; -100% Life Steal, -50% Regeneration/Dodge modifications and -100% Speed modifications. | Use HP and consumables. HP grants Damage%, not a direct Melee Damage stat. |
| Doctor | Restore 200 HP within one wave | +200% Attack Speed with Medical, +5 HP Regeneration with +100% modifications, +5 Harvesting; -100% Attack Speed and -50% Armor modifications. | Use Medical weapons while still buying enough damage and HP. |
Four unlock checks that prevent wasted attempts
Engineer needs 5 turrets present at the same time. Do not add placements from different waves, and check whether combining Wrenches reduces the count. Doctor needs 200 HP restored within one wave; merely owning healing while at full health does not supply that restoration.
Knight becomes available after a Danger 4 clear and Bull after a Danger 1 clear. Reaching a late wave is not the same as clearing it. Pacifist’s 10000 materials are cumulative, not a requirement to hold 10000 simultaneously.
Turn the selection into a weapon and shopping plan
For a first Danger 0 run with Well Rounded, an SMG-focused plan is one example; a Stick-based melee plan is another. The focused guide covers the standard 6 weapon slots, early shop offers, locking and combining.
Do not force six identical weapons onto every character. Bull cannot equip weapons, Gladiator rewards different weapon types, Engineer develops structures and Pacifist prioritizes survival.
Before shopping, ask whether you struggled to kill enemies or killed them but took too many hits. For the first problem, check weapons and damage scaling. For the second, check HP, protection, recovery and movement.
Version, DLC and Nightmare boundaries
Checked on 2026-10-17 for PC / Steam 1.1.15.4, solo Crash Zone and Danger 0–5. Nightmare is a separate added difficulty. DLC and port differences are outside scope. No win rates were measured or clears tested in game.
Official 1.1.15.2 notes restricted ordinary-run level-up offers for certain characters. Avoid plans that wait for ineffective offers such as Melee/Ranged Damage on Mage. Offers after wave 20 in Endless have a separate exception.
The official announcement dated 2026-10-08 schedules Primal Dread for 2026-11-02. It is unreleased at the check date; its new characters, Evolution and Pets are not folded into this base-game comparison. The Japanese DLC index is a separate reference.
Questions and answers
Can I choose Knight for my very first run?
Knight requires a Danger 4 clear. While it is locked, choose from the 5 default characters for a first run.
Is this a strongest-character ranking for the whole roster?
It is a goal-based comparison of 17 base-game characters, not a measured ranking of all 64, every DLC or Nightmare.
Is this equivalent to the first-run shop guide?
No. This page compares characters; the focused guide explains weapons and shopping for a Well Rounded Danger 0 plan.