FTL: Faster Than Light(PC (Steam) / Mac / Linux)
The Rebel Flagship's 3 Phases
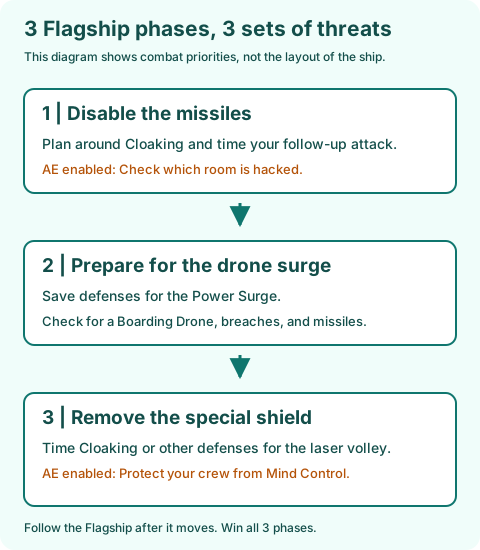
Plan for missiles in phase 1, drone surges in phase 2, and the special shield and volleys in phase 3. Start by orienting yourself in Sector 8.
Scope: PC Steam base game and Advanced Edition (AE enabled and disabled are distinguished). Content checked October 2, 2026.
Locate the Base and Flagship Before Fighting
- When you enter Sector 8, locate the base and the Flagship. As the Flagship approaches the base, do not travel too far away to repair.
- The Flagship moves after each phase. Check crew, oxygen, fires, ammunition, and drone parts before starting the next fight.
- Use the map to decide whether you can reach a repair beacon. Do not expect fixed repair locations or an identical route every run.
- You only win after all 3 phases. Do not spend all your parts and ammo in phase 1.
Phase 1: Stop the Missiles First
- Pause and check the missile artillery, Shields, Cloaking, and crew positions. Regular shields cannot stop missiles.
- If you have Cloaking, time it for the dangerous missile volley. A Defense Drone does not guarantee every incoming missile is intercepted.
- Use weapons or boarders to disable the missile room. Prioritize silencing dangerous artillery over hull damage.
- Synchronize shield-breaking and hull-damaging shots. Ready weapons while the enemy is cloaked.
- With AE enabled the Flagship uses Hacking. Check which room it disrupts, your power and doors, and your healing. Do not send everyone into the hacked room.
Phase 2: Save Defenses for Drone Surges
- The Flagship shifts to a drone-heavy setup. If a Boarding Drone gets inside your ship, assign repair and combat roles separately.
- Prepare for the Power Surge drones. If you have Cloaking, do not use it on every regular shot and leave it on cooldown for the surge.
- Missiles are still dangerous. Disable them, then get through shields to damage the hull.
- The enemy Defense Drone may intercept your Hacking drone. Do not repeatedly burn through parts; use weapons or another way to break through.
- Prepare crew and oxygen for the next phase, and repair the breach made by the Boarding Drone. Destroying the enemy does not clear your damage.
Phase 3: Remove the Special Shield and Survive the Volley
- Remove the special Zoltan Shield first. Do not expect missiles or boarding to work as they do against normal shields.
- With AE enabled, expect Mind Control. Check the controlled crew member and nearby allies. Avoid leaving them in melee where they keep damaging your crew.
- Once the special shield is down, disable missiles, drop regular shields, and attack the hull.
- Use Cloaking or another defense for the large Power Surge laser volley. Do not let the fight run as if it were a single regular shot.
- Defeat phase 3 to win. The Easy and Normal victory achievements require finishing a run on the respective difficulty.
Easy and Normal vs. Hard
| Factor | What to Check |
|---|---|
| Enemy Shields | Easy has 3 regular layers; Normal and Hard have 4. Check that you have enough shots to get through. |
| Artillery Room Connections | On Hard, some artillery rooms connect to the main hull. Do not use boarding tactics that depend on the isolated rooms on Easy and Normal. |
| After Killing the Crew | The Flagship can operate without crew. Killing its entire crew does not end the fight by itself. |
| Advanced Edition Setting | AE adds systems such as Hacking in phase 1 and Mind Control in phase 3. |
- Plan boarder retrieval, missile suppression, and defense against volleys separately. Even after killing all the Flagship crew, you still have to destroy the hull.