Downwell: Five Styles, Shops and 20 Steam Achievements
Style differences, six shop items, normal/Hard progression and combat, combo and gem conditions.
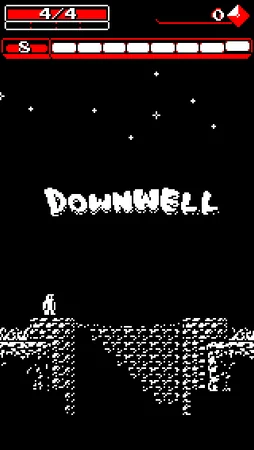
Image: Ojiro Fumoto / Devolver Digital
Searching does not open spoiler solutions.
Five styles
Show / hide details
The selected style affects the whole run even when your weapon changes.
| Style | Effect | Approach |
|---|---|---|
| Usual | Standard settings | Use it as the baseline for learning movement and enemy types. |
| Arm Spin | Gem rooms become weapon modules; fewer shops | Accept weapon changes and collect health and charge. Insisting on one weapon can make you miss supplies. |
| Boulder | Starts with 6 HP, faster falling and two upgrade choices | Use the extra health but judge landings sooner; consider Youth to expand choices when offered. |
| Levitate | Slower falling | More time for shooting and horizontal movement; beware of enemies catching up from behind. |
| Handstand | No between-stage upgrades; cheaper shops | Collect gems early and build around shop health and charge upgrades. |
Six shop items
Show / hide details
Separate restoring missing health from increasing maximum health.
| Item | Increase | When to choose |
|---|---|---|
| Rice Roll | 1 HP | Patch a small health deficit. |
| Sushi | 2 HP | Recover after several hits. |
| Curry | 1 maximum HP | Improve longer-term survival. |
| Battery | 1 maximum charge | Add a little firing capacity. |
| Car Battery | 2 maximum charge | Prepare for high-consumption weapons. |
| Energy Drink | 1 HP + 1 maximum charge | When both health and ammunition capacity are lacking. |
Prices vary with progression and discounts. Check the purchase screen instead of assuming a fixed price.
10 progression achievements
Show / hide details
Separate the four areas and boss in normal mode from those in Hard.
| Progress | Normal | Hard |
|---|---|---|
| Area 1 | Bye Frogs | So Many Frogs |
| Area 2 | Bye Ghosts | So Many Ghosts |
| Area 3 | Bye Squids | So Many Squids |
| Area 4 | Bye Stuff | So Much Stuff |
| Final boss | Bye Well | Well Master |
Five rows with two conditions each total ten achievements. Hard becomes available after defeating the normal boss.
10 action, combo and gem achievements
Show / hide details
Practice incompatible challenges separately from ordinary runs.
| Achievement | Condition | Execution |
|---|---|---|
| Careful Descent | Finish one stage without damage | Use safe early floors and prioritize survival over combos. |
| Time Never Stops | Finish one stage without entering side rooms | Avoid shops, weapon rooms and gem rooms from start to exit. |
| Mottainai | Do not shoot during one stage | Jump and aerial shooting share an input: stop tapping in midair and use safe floors and stompable enemies. |
| Pacifist | Finish one stage without killing an enemy | Avoid stomps and explosion kills as well as shooting. |
| Ground Allergy | Finish one stage without intermediate landings | Plan enemy and object refills; do not land on ordinary floors. |
| Wow Combo | Bank a 10 combo by landing | Continue two enemies beyond the reward at 8. |
| Whoa Combo | Bank a 30 combo by landing | Do not stop at the healing reward at 25; plan the next enemy and a safe landing. |
| Sugoi Combo | Bank a 100 combo by landing | Carry chains across stages. Use refill objects and time-stop spaces rather than forcing a normal-floor landing. |
| Saving Up | Hold more than 3000 gems | This is not cumulative unlock currency. Limit spending and hold them during that run. |
| Frugality | Hold more than 5000 gems | Keep saving after passing 3000. Sustain health while repeatedly collecting 8-combo rewards. |
Adjusting for Hard
Show / hide details
Do not assume normal-mode waiting spots remain safe with more enemies.
- Open a downward route rather than killing everything. Check whether pursuit comes from above or below.
- Oxygen drains quickly in the Aquifer. Locate the next oxygen supply before a healing detour.
- Bosses have more attacks. Leave time for horizontal movement and reinforcements instead of prolonged fire at the weak point.
Frequently asked questions
Are the Steam and PlayStation totals identical?
This guide covers the 20 Steam achievements. Platform-specific entries such as a platinum trophy are not included.
Can no-shooting and no-killing use the same approach?
No-shooting allows stomps, while no-killing also forbids them. Practice separate runs first so you can track each condition.